Finding and Recovering Deleted Chats Through Unarchived Messages.
Ensure that you had actually removed archived the messages. Archived messages on Messenger are put into a different folder that is not shown in the location of the recent chat.
Follow the steps in this guide to retrieve all your deleted messages from FB Messenger.
Make sure to launch the Messenger Application on your mobile device. And ensure you are signed in to the correct Messenger Account!
Next, navigate to the Facebook Messenger search bar and find the chat conversation(s) you think you had removed.
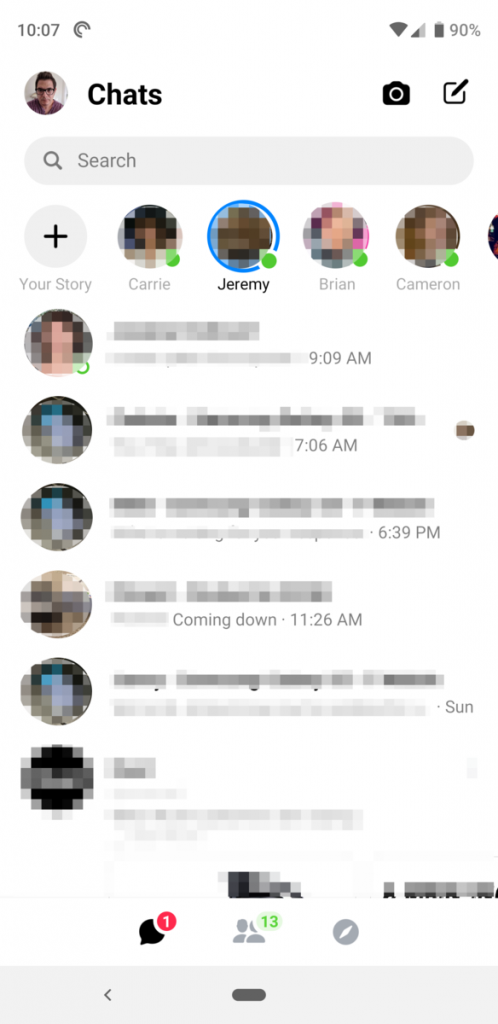
When you eventually find the desired Messenger chat, endeavor to send a new message to the recipient whom you had deleted their messages. This action will unarchive the entire chat conversations you had with the user on Messenger.
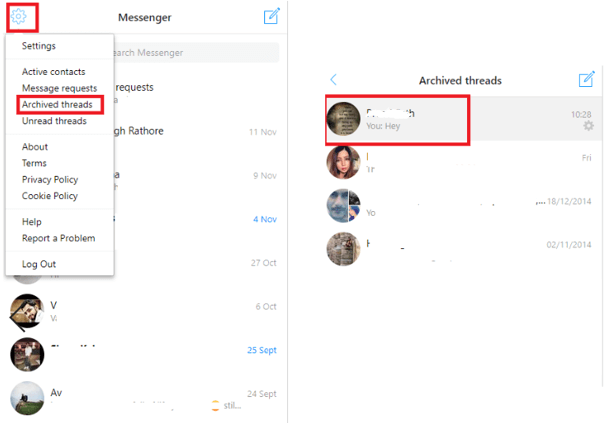
On laptop or desktop PC, Click to Launch FB Messenger > Go to FB Messages Tab > Click on the ‘gear’ icon > Click on the “Archived Threads.” All your archived messages will be visibly shown there.
Restoring a Deleted Facebook Message On Android Mobile Device Using Desktop or Laptop PC.
FB Messenger, on their normal doing, saves a copy of all Facebook Messages on your device storage. Hence, try finding your deleted Facebook messages on your Android phone’s file explorer:
STEP 1- Attach your phone into your system via USB cable and locate your device.
STEP 2- Head towards ‘SD Card or Internal Storage’ > click on ‘Android’ > ‘Data’ > find “com.facebook.orca”.
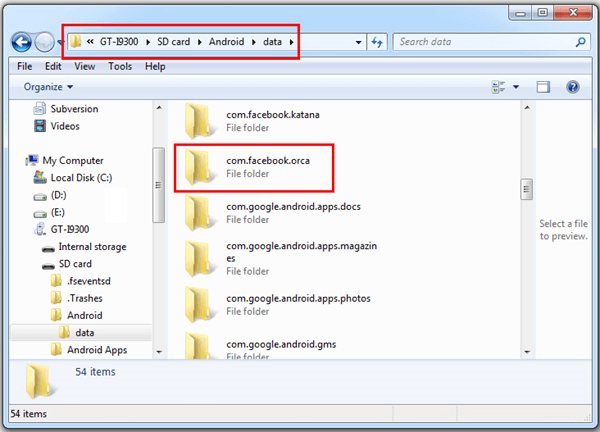
STEP 3- com.facebook.orca > cache > fb_temp > find out your Facebook messages with backups in the folder.
STEP 4- Start recovering deleted messages on Facebook Messenger from your computer.
How to Archive Facebook Messages
You may be asking the question of how do I archive Facebook messages on Messenger? Or probably asking yourself why you should even consider archiving your Messenger messages. Well, if you have a crowded chat inbox, and it becomes somewhat difficult to find the desired conversation you actually needed, you should know that it is high time to archive some unnecessary conversations or at least messages from spammers. Archiving is usually a better option for deleting the messages or conversations because a situation may warrant you to needing them again in the near future. This guide is here to show you how you can archive Facebook messages effortlessly:
- To archive messenger conversation, navigate to the specific conversation and then press and hold. On the options that appear, click on the “Archive Conversation” button. The Messenger conversation will no longer appear in your Inbox, but you can always find it in the Archive.
- Another way to do this is to navigate to “Messages.” Select the conversation you wish to archive, and click the “X” button next to the conversion to archive Facebook messages.
READ: Facebook Marketplace App
Tips: If you do not want the messages anymore, you can learn how to delete Facebook messages here on this blog, as well.

Where Can I Find Archived Messages On Messenger?
Are you bothered about how to view your archived messages on the Facebook messager? Do not stress yourself any further; we are here for your service of archiving and unarchiving conversations on the Facebook Messenger application.
Now let us assume that you have archived some Facebook messages, and after a while, you want to get them back. Which is why archiving is always preferred to deleting chats. To read an archived Facebook message, follow the steps given below:
- Navigate to ‘Messages.’
- Click on the “More” button and then on the Archived button you see above all the conversations.
- Enter the Archive.
- Select the conversation you want to read. You can either read the message in the archive or restore it to your inbox.
- I hope this can help you successfully read your Facebook archived message.

How to Recover the Facebook Messages that You Have Archived
If you archived Facebook messages at some time, you probably know you will need them again in the future. So how to unarchive Facebook messages? It is easier than you think. Just follow our instructions to unarchive Facebook archived messages:
- Go to “Messages.” Click “More” and the “Archived” button.
- Enter the Archive and select the conversation you need to recover.
- Click the small arrow button – Unarchive on the conversation or go to “Actions” and click the “Unarchive” button.
- Your conversation will be restored, and you can find it now in your Inbox.

How to Delete Single Chat Messages or Conversations on Facebook
What if you have some spam messages on messenger or any other type of FB messages you do not want to see any more on your Facebook account? Instead of archiving the messages, you may need to delete them. Keep in mind that this is a permanent solution. To delete messages or conversations on Facebook, follow the next steps:
- Navigate to Messages. Select the conversation you want to delete.
- Navigate to the “Actions” button at the top right corner of the FB conversation window.
- Select “Delete Conversation” and confirm by clicking the “Delete Conversation” button.
- There is also the option to “Delete Messages,” but it will delete only selected lines from the conversation.

Dealing with archived FB messages is very easy. Whether you want to archive or delete a conversation, or maybe to a restored and old archived message, it will take a few seconds, if you abide by our instructions. Additionally, never delete messages you think you may need in the future. You can easily keep the in your Archive and read them when you need them. Delete only spam FB messages or FB conversations. You are sure messages do not contain useful information.
How to Recover Deleted Data on iPhone/iPad/iPod touch
If you accidentally deleted FB messages, videos, contacts, photos documents, app, etc., and you wish to restore them, one amazing software for you is iSkysoft Toolbox – iOS Data Recovery.
Why Choose This Software to Recover Messages on iPhone/iPad/iPod touch:
- Complete iOS compatibility – This is one of the reasons why this tool is so versatile; you can use it on any iOS (including iOS 11) device.
- Three recovery modes – You can get your lost data from iTunes, iCloud, or your iPhone device whenever you need to.
- Recover file types – iSkysoft Toolbox – iOS Data Recovery can recover up to 20 different file types from your backup files or iPhone.
- Easy of use – The design of the tool allows even the most tech-phobic user to navigate through it quickly.
- Preview your files – You can preview your backup files before you sent them back to your device.
Step-by-Step How to Recover Lost Messages on iOS Devices
1 – Launch the Software or App
First, please sure you have downloaded and installed iSkysoft Toolbox for iOS on your computer. You can download it from the links below. Then open it. Connect your iPhone (iPhone X and iPhone 8 Plus supported) to your computer. You can see the main window like this. Choose the “Data Recovery” menu.
See: Install Free Facebook Messenger Updated

2 – Choose “Recover from iOS Device” Mode
By default, you’ll be directed to the “Recover from iOS Device” window. Check the type of files you wish to recover. Then click on “Start Scan.” It will start scanning and show you the results later.

Step 3. Preview and Recover iOS Data
Once your scan process is completed, you can check the results and view the details by clicking them before you decide to recover to the iPhone.

